1 Fat Quarter (A square of fabric that's about 18" x 22")
2 pieces of elastic ( 10" and 8") Any width, but I used 3/4 inch.
1 Safety Pin
Basic sewing supplies
Optional:
Ribbons
Scrap Fabric
Other embellishments.
Shout out to my favorite bestie in Indiana (Beast/Ashley) for this amazing idea. Love you lots!
Let's jump in!

Isn't this pink owl bag holder cute?! I'm so happy with how it came out!
Let me show you how to make your own :)

You really only need, a piece of fabric, elastic, and a sewing machine for this project.
But if you want it to look fancy like mine, you'll need ribbon too :)

I started out by trimming up my FQ to make sure all the sides were the same.
I trimmed the long side to 21.5. Numbers really aren't important in this project.

When trimming up the other side, I cut off 2" that will be ironed into the handle.
You can also use ribbon for the handle like I did on the pink one.

I ironed it in half and then ironed both sides to the middle to make a binding.
I then sewed down one side, closing it.

I chose a ribbon that was very wide.
This project is so good to use up all that ribbon!
Use glue to hold the wide ribbon down.
Careful, Elmer's glue is bad for your needle, but can be used if you don't plan to sew over it.

I slowly sewed down one end of the wide ribbon, as close to the edge as I could.
Then, on the other side I lost my patience, and sewed really fast, and caused a gathering in my project
(-_-)

Don't be like me. Take. Your. Time.

Next, iron 1/4 inch on the top and bottom of your short side of your fabric.
(Parallel to your ribbon)

Next iron a hem that is a little wider than your elastic.
My elastic is 3/4 of an inch, so I made a 1" casing.

Next unfold that casing and sew down the long side of your project, right sides together.
Using pins to match up your ribbon first, then pinning the rest.
You don't have to unfold the first 1/4 hem.

You can see at the top I kept the first hem folded and started sewing down the long side.

You should have a tube now!
You can fold the casing back over now, and can even snip the seam allowance a bit to help get it out of the way.

Using a Friction pen, or a pen, mark a 1 1/2 inch gap on the top and bottom of the casings.
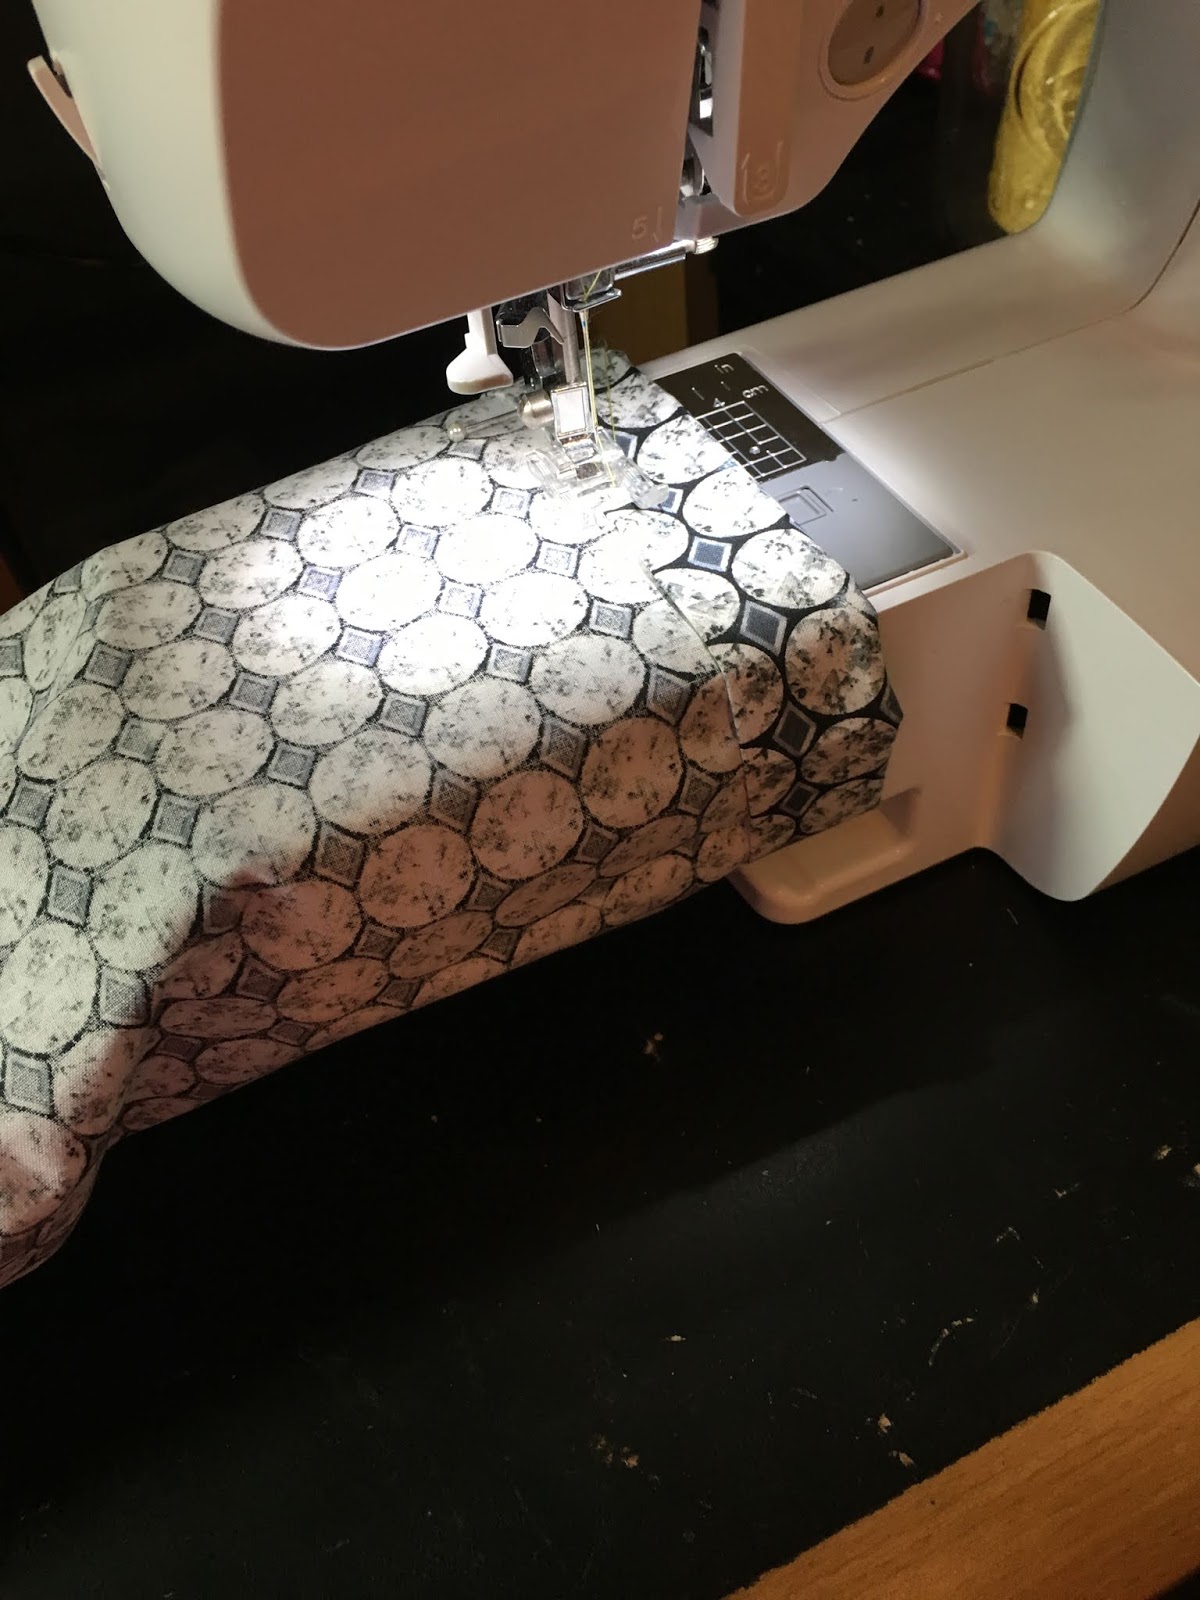
Take the attachment off your machine and put the tube around the free-arm of your machine.

Be sure to stop and back-stitch around the gap we left for the safety-pin.
The 10" elastic will be the top, and the 8" piece will be the bottom.

Pin the safety-pin to the elastic and thread the elastic through the casing we made.
If you lose the end of the elastic in the casing, you can use a second safety-pin to hold it in place.

Using a zig-zag stitch, close your elastic.

Be sure to go back and forth over it a lot.

The elastic should snap into the casing after you have sewn in.
Time to sew the gap closed!

On the gap that has the 10" elastic, slide the end of the handle in, before closing the gap.

I reinforced the handle after I closed the gap.
Bags aren't heavy, but you can never be too safe.

And you're done!!
My friend did it MUCH quicker, and in an easier manner, but I always have to be extra, and hide all my seams :)
I almost did a French inseam for the center! But I didn't ;)
Be sure to let me know if you make this!