Thursday, February 21, 2019

Plastic Bag Holder

Supplies needed:
1 Fat Quarter (A square of fabric that's about 18" x 22")
2 pieces of elastic ( 10" and 8")  Any width, but I used 3/4 inch.
1 Safety Pin
Basic sewing supplies

Optional:
Ribbons
Scrap Fabric
Other embellishments.

Shout out to my favorite bestie in Indiana (Beast/Ashley) for this amazing idea. Love you lots!
Let's jump in!


Isn't this pink owl bag holder cute?! I'm so happy with how it came out! 
Let me show you how to make your own :) 


You really only need, a piece of fabric, elastic, and a sewing machine for this project. 
But if you want it to look fancy like mine, you'll need ribbon too :) 


I started out by trimming up my FQ to make sure all the sides were the same. 
I trimmed the long side to 21.5. Numbers really aren't important in this project.  


When trimming up the other side, I cut off 2" that will be ironed into the handle. 
You can also use ribbon for the handle like I did on the pink one. 


I ironed it in half and then ironed both sides to the middle to make a binding. 
I then sewed down one side, closing it. 


I chose a ribbon that was very wide. 
This project is so good to use up all that ribbon!
Use glue to hold the wide ribbon down. 
Careful, Elmer's glue is bad for your needle, but can be used if you don't plan to sew over it. 


I slowly sewed down one end of the wide ribbon, as close to the edge as I could. 
Then, on the other side I lost my patience, and sewed really fast, and caused a gathering in my project 
(-_-) 


Don't be like me. Take. Your. Time. 


Next, iron 1/4 inch on the top and bottom of your short side of your fabric. 
(Parallel to your ribbon) 


Next iron a hem that is a little wider than your elastic. 
My elastic is 3/4 of an inch, so I made a 1" casing. 


Next unfold that casing and sew down the long side of your project, right sides together.
Using pins to match up your ribbon first, then pinning the rest. 
You don't have to unfold the first 1/4 hem. 


You can see at the top I kept the first hem folded and started sewing down the long side. 


You should have a tube now!
You can fold the casing back over now, and can even snip the seam allowance a bit to help get it out of the way. 


Using a Friction pen, or a pen, mark a 1 1/2 inch gap on the top and bottom of the casings. 


Take the attachment off your machine and put the tube around the free-arm of your machine. 


Be sure to stop and back-stitch around the gap we left for the safety-pin. 
The 10" elastic will be the top, and the 8" piece will be the bottom. 


Pin the safety-pin to the elastic and thread the elastic through the casing we made. 
If you lose the end of the elastic in the casing, you can use a second safety-pin to hold it in place. 


Using a zig-zag stitch, close your elastic. 


Be sure to go back and forth over it a lot. 


The elastic should snap into the casing after you have sewn in. 
Time to sew the gap closed! 


On the gap that has the 10" elastic, slide the end of the handle in, before closing the gap. 


I reinforced the handle after I closed the gap. 
Bags aren't heavy, but you can never be too safe. 


And you're done!! 
My friend did it MUCH quicker, and in an easier manner, but I always have to be extra, and hide all my seams :)
I almost did a French inseam for the center! But I didn't ;) 

Be sure to let me know if you make this!

Friday, March 16, 2018

Sewing Tip! Reusing Scrap Batting

Sometimes, you just need a LITTLE bit more batting, for a small project... Or a large one! I'll show you how to piece together scrap pieces of batting to make one usable piece! This is a tip I learned a few years ago, and it has saved me SO many trips to the store!


On another project I am working on, I needed eight 9x9 squares of batting. (The soft stuff int he middle of projects, that no one sees.) I fell short of 2 squares while cutting out my batting. Luckily! The chunk of batting I was cutting from gave me some large scraps! Here's how to sew them together!
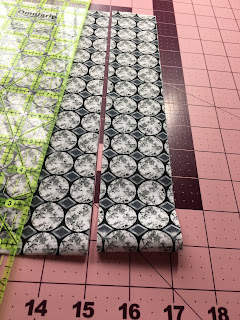
First you will need some scrap pieces. 


Next you will need to make sure that at least ONE side on each piece is perfectly straight!
(This is IMPORTANT!) 


Next, go to your sewing machine, and find your zig-zag stitch.
On my machine, it's the number 4 stitch. 


Next, I set my machine to make the zig-zag WIDER.
My machine goes up to 7 on this setting, but 6 is enough.
The top number (1.4), is how LONG the stitch will be. That's not super important in this case. 


Next, place your two pieces together under the machine, lining up the middle with the center of the presser foot (The part that holds down your fabric as you sew)


Next, just sew down! Be sure to keep the two pieces close together, and that each stitch goes over both pieces, to bind them together. 


You should have one flat piece of batting now! 
Just trim it up to the size you need! 


"What if my scrap pieces are completely different sizes?"
Great question! For my next square, I had to get a scrap piece of batting from my "stash"
First, do a quick measure to make sure you will be able to get what you need out of it.
I cut it close on this one, haha! 


First, I trimmed it so that it would be the same length as the larger piece. 


Next, I trimmed a bit off the smaller piece to make sure it was perfectly straight.
If one or both of them are wavy, not straight, you wont be able to put them flat against each other under the sewing machine. 


And that's it!! I will show you what I did with my squares next Friday!

Was this tip helpful to you?
Visit my Facebook page for more blogs!
I post food blogs every Monday and craft blogs every Friday!


Friday, March 9, 2018

Curtain Holders! - Super Easy


After I made these particular curtain holders, I thought of 100 other ways to make them! So, I will have to make a separate blog covering those. This one blog  is long enough, just showing this one technique.

Supplies:

  • Basic sewing supplies (Sewing machine, Ruler, Rotary cutter, scissors) 
  • Velcro (There is a specific kind safe for sewing machines, just read the package)
  • Fabric (One fat quarter is perfect for one set)
  • Batting (Optional! Only necessary if your fabric is thin/ light colored) 

I used yardage for this project. I don't recommend going out and buying yards of fabric for this project. I am using this so it will match another project I am making for my nursery :) 


I cut one 3" strip off of my yardage.
If you are using a fat quarter, you can get away with 4.5" so you use the whole piece of fabric. 


Since mine was one long strip, I just use scissors to cut it in half. 


Trim up the ends, to make sure the salvage (words printed on the fabric) aren't showing. 
I allowed some of the words, because I knew I would be sewing over them. 


No matter your source of fabric choice, you need 4 strips of fabric to make these! 
Mine measured 3" x 11" 
I recommend 4.5" x 14" if you are using a fat quarter though! 
I regret not being able to make my strips bigger. but I was working with what I had. 


OPTIONAL!
If you chose a white/light fabric like I did, you might want to put a layer of batting in between. 
The next few steps show how to do that. 
But, the first time I made these (last year) I didn't use any batting, and they turned out great. 


If you are using batting, place one strip of fabric on top of the batting. 
You only need two of your fabric strips for this part. 
You have the option of just basting around the edge , or quilting the batting down. 
(Pictured: Top strip - Sewn around the edge.
Bottom strip - Quilted to the batting) 


I decided to quilt mine. 
Note: You should only be sewing through one piece of fabric and one strip if you are doing this step. 
(Don't worry about my pen marks, they are special pens that the ink disappears with the iron) 


Velcro! 
There are many different kinds at the store. 
We will be securing these to the fabric by sewing them down, so make sure your package says
"Sew on Velcro"
If you use the sticky kind, it will gum up your sewing machine if you try to sew through it. 


Because my strips were 3" wide, I know the final product will finish at 2.5 inches. 
I cut two pieces of Velcro at an 1.5 each. 
You just need to make sure they are shorter than the width of your strips, with a little extra room. 


Pin or glue your Velcro down, giving space to sew around the edges. 
(You can see on the bottom piece, I did not listen to me) 
If you decide to glue it down, only use glue that is safe for sewing machines! 
There is a technique you can use Elmer's glue, but it involves an iron and VERY little glue. 
I'm trying to keep this as beginner friendly as I can :) 


(You can really see how thin my fabric was in this picture!)
Next! Sew the Velcro down.
You can do a box with an X through, it, but I only did the outside of the Velcro. 
Put the other half of the Velcro, on the opposite side of the other two strips. 


Place one fabric strip on top of another, making sure the Velcro is on opposite sides. 
They should be "Right sides together" Or Pretty sides facing one another. 
After we sew around, we will be turning them right side out. 
So leave a hole to turn on the long side, like pictured above. 


After you have sewn all the way around, clip your corners to reduce bulk, and get a clean corner.
(Do not cut through your stitches!!) 


Use the gap you left for yourself to turn them right side out. 
Then take them to the iron, to flatten out. 


We will close the hole we used to turn them out by top stitching all the way around the strip.
(Top stitching is just sewing on top of layers, where you can see them) 

And you are done!!
These are reversible! I didn't just quilt one strip. 
Pictured above is the front and back of the strip. 


I wish mine were a bit longer, but they got the job done!


Here are the ones I made last year. 
These didn't have any batting in them, and I believe the strips measured around
4.5" x 14" 


I love opening all the curtains in the morning, and letting the sun in. 
It really gets me motivated!! 

Let me know if you make these! 
I would love to see them!! 
Just post them on my page!