After I made these particular curtain holders, I thought of 100 other ways to make them! So, I will have to make a separate blog covering those. This one blog is long enough, just showing this one technique.
Supplies:
- Basic sewing supplies (Sewing machine, Ruler, Rotary cutter, scissors)
- Velcro (There is a specific kind safe for sewing machines, just read the package)
- Fabric (One fat quarter is perfect for one set)
- Batting (Optional! Only necessary if your fabric is thin/ light colored)
I used yardage for this project. I don't recommend going out and buying yards of fabric for this project. I am using this so it will match another project I am making for my nursery :)
I cut one 3" strip off of my yardage.
If you are using a fat quarter, you can get away with 4.5" so you use the whole piece of fabric.
If you are using a fat quarter, you can get away with 4.5" so you use the whole piece of fabric.
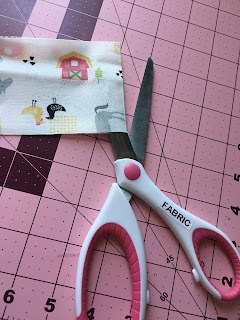
Since mine was one long strip, I just use scissors to cut it in half.
Trim up the ends, to make sure the salvage (words printed on the fabric) aren't showing.
I allowed some of the words, because I knew I would be sewing over them.
No matter your source of fabric choice, you need 4 strips of fabric to make these!
Mine measured 3" x 11"
I recommend 4.5" x 14" if you are using a fat quarter though!
I regret not being able to make my strips bigger. but I was working with what I had.
OPTIONAL!
If you chose a white/light fabric like I did, you might want to put a layer of batting in between.
The next few steps show how to do that.
But, the first time I made these (last year) I didn't use any batting, and they turned out great.
If you are using batting, place one strip of fabric on top of the batting.
You only need two of your fabric strips for this part.
You have the option of just basting around the edge , or quilting the batting down.
(Pictured: Top strip - Sewn around the edge.
Bottom strip - Quilted to the batting)
I decided to quilt mine.
Note: You should only be sewing through one piece of fabric and one strip if you are doing this step.
(Don't worry about my pen marks, they are special pens that the ink disappears with the iron)
Velcro!
There are many different kinds at the store.
We will be securing these to the fabric by sewing them down, so make sure your package says
"Sew on Velcro"
If you use the sticky kind, it will gum up your sewing machine if you try to sew through it.
Because my strips were 3" wide, I know the final product will finish at 2.5 inches.
I cut two pieces of Velcro at an 1.5 each.
You just need to make sure they are shorter than the width of your strips, with a little extra room.
Pin or glue your Velcro down, giving space to sew around the edges.
(You can see on the bottom piece, I did not listen to me)
If you decide to glue it down, only use glue that is safe for sewing machines!
There is a technique you can use Elmer's glue, but it involves an iron and VERY little glue.
I'm trying to keep this as beginner friendly as I can :)
(You can really see how thin my fabric was in this picture!)
Next! Sew the Velcro down.
You can do a box with an X through, it, but I only did the outside of the Velcro.
You can do a box with an X through, it, but I only did the outside of the Velcro.
Put the other half of the Velcro, on the opposite side of the other two strips.
Place one fabric strip on top of another, making sure the Velcro is on opposite sides.
They should be "Right sides together" Or Pretty sides facing one another.
After we sew around, we will be turning them right side out.
So leave a hole to turn on the long side, like pictured above.
After you have sewn all the way around, clip your corners to reduce bulk, and get a clean corner.
(Do not cut through your stitches!!)
Use the gap you left for yourself to turn them right side out.
Then take them to the iron, to flatten out.
We will close the hole we used to turn them out by top stitching all the way around the strip.
(Top stitching is just sewing on top of layers, where you can see them)
And you are done!!
These are reversible! I didn't just quilt one strip.
Pictured above is the front and back of the strip.
I wish mine were a bit longer, but they got the job done!
Here are the ones I made last year.
These didn't have any batting in them, and I believe the strips measured around
4.5" x 14"
I love opening all the curtains in the morning, and letting the sun in.
It really gets me motivated!!
Let me know if you make these!
I would love to see them!!
Just post them on my page!


No comments:
Post a Comment